Low code development - transform JSON data into HTML with PowerAutomate
I've recently started working with PowerAutomate, and it's pretty neat. It's a low-code automation tool that helps streamline workflows by connecting apps and services with minimal or no coding. It also supports API integrations, webhooks, and custom HTTP requests, making it flexible for developers to automate complex processes.
To help me hit the ground running, I wanted to build out some simple little flows, and transforming JSON to HTML seemed like a good place to start. Let's go!
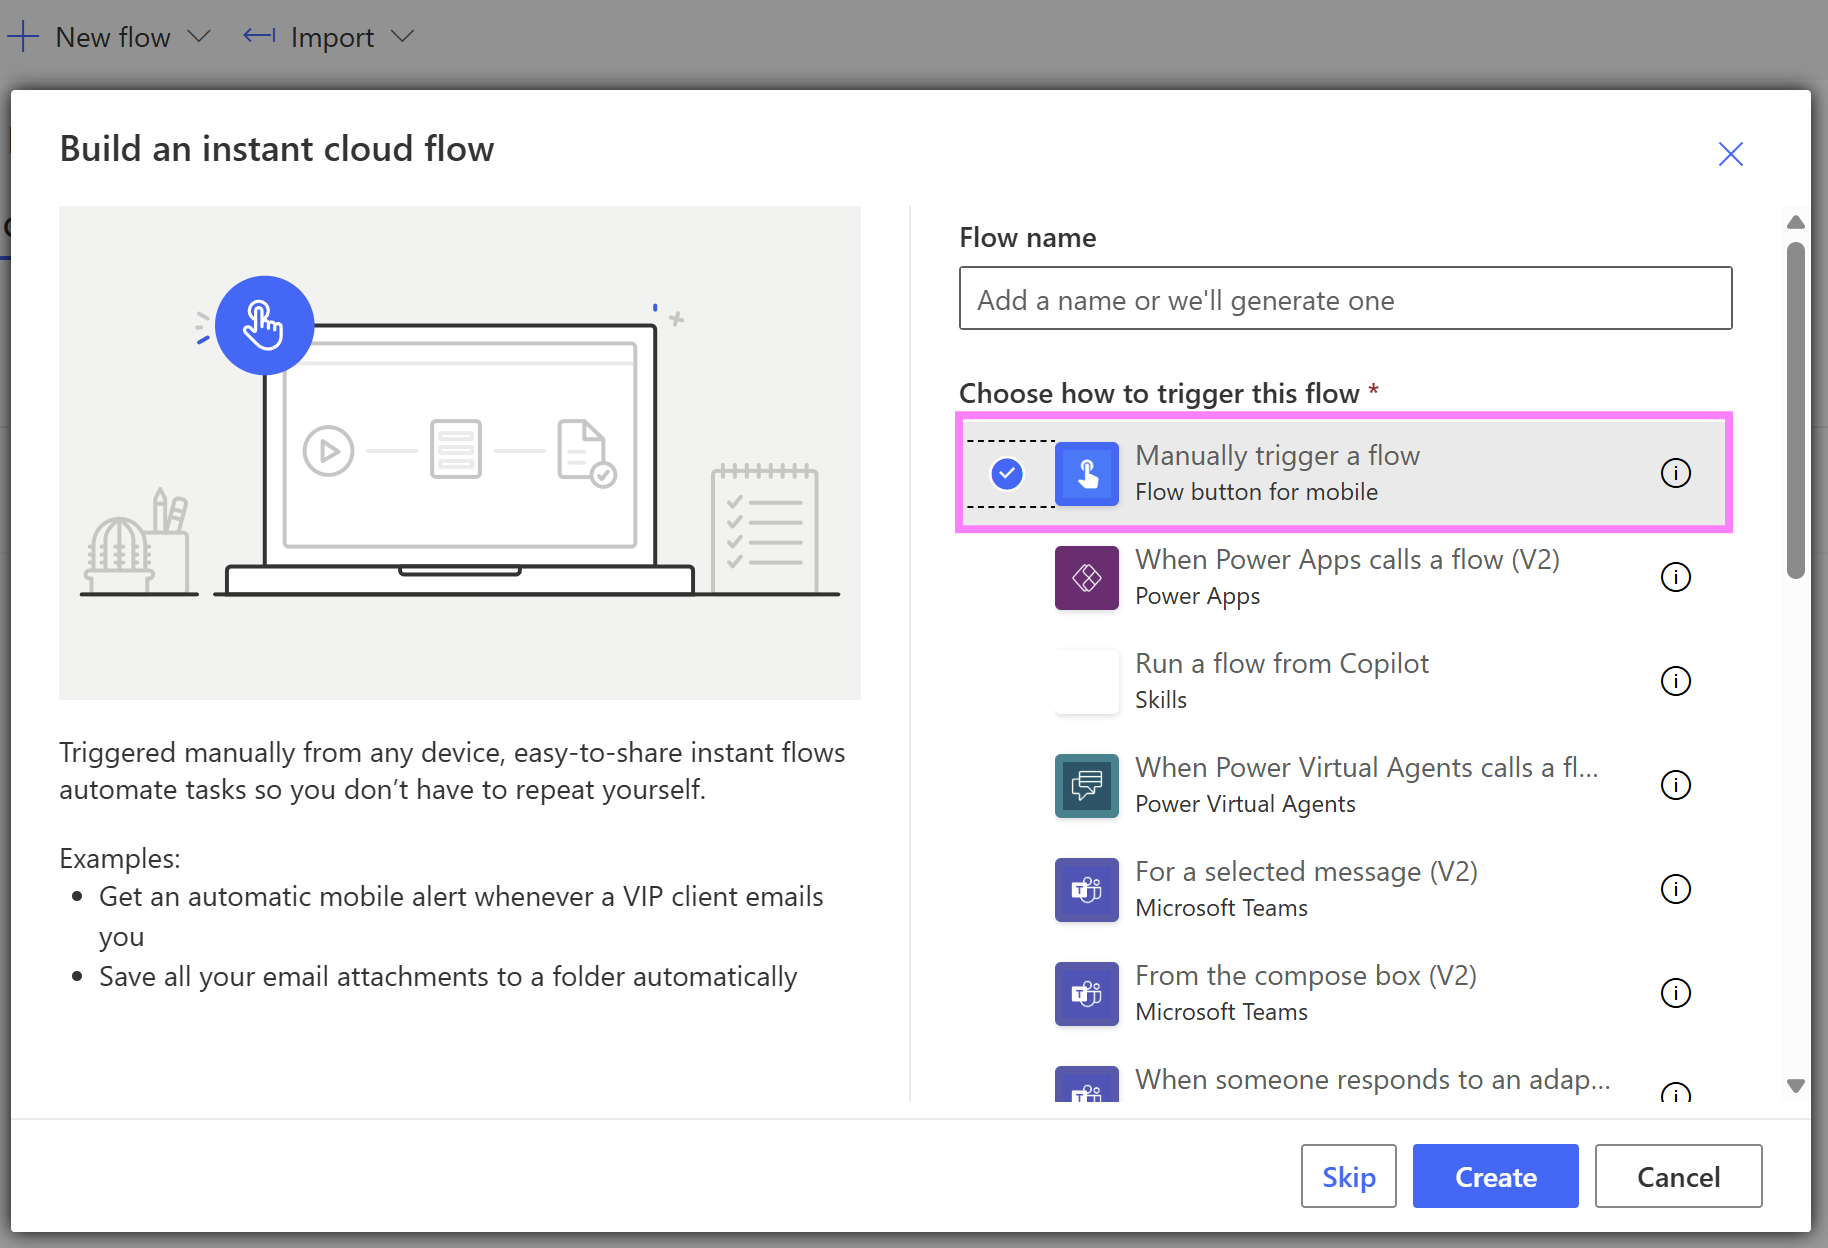
First we start by creating an Instant Cloud Flow with a manual trigger. This means that the flow will only run when we hit the Run or Test button.
Now we can start adding in some actions. These are the building blocks for our flow.
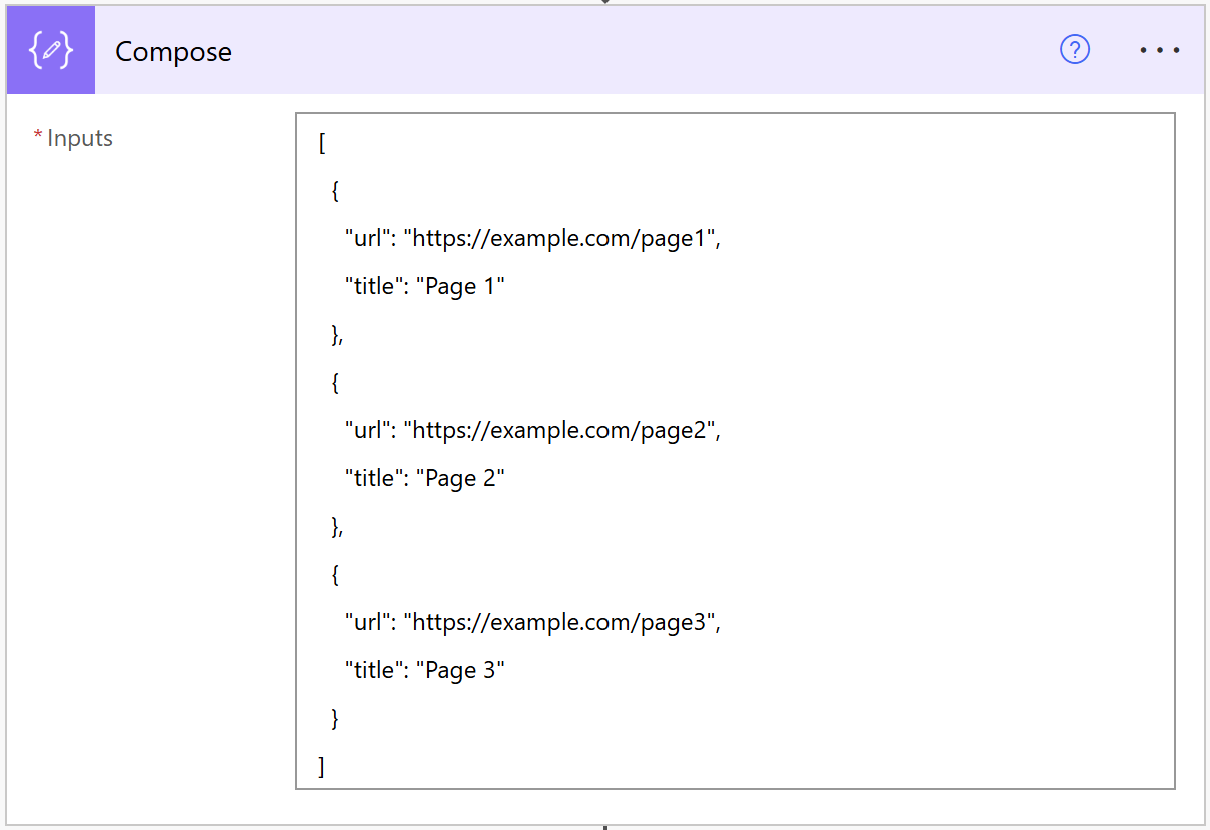
The first one we'll need is a Compose action. This will be to hold our sample JSON data that we'll later transform into HTML.
Think of the Compose action as a way to hold or manipulate raw data, such as the JSON string. It essentially stores the data in its current format, which is not yet usable for individual fields within the flow.
Our sample JSON data is going to be a some dummy data representing a very basic sitemap. You can copy this:
[
  {
    "url": "https://example.com/page1",
    "title": "Page 1"
  },
  {
    "url": "https://example.com/page2",
    "title": "Page 2"
  },
  {
    "url": "https://example.com/page3",
    "title": "Page 3"
  }
]
Paste this in to the Compose action Inputs field:
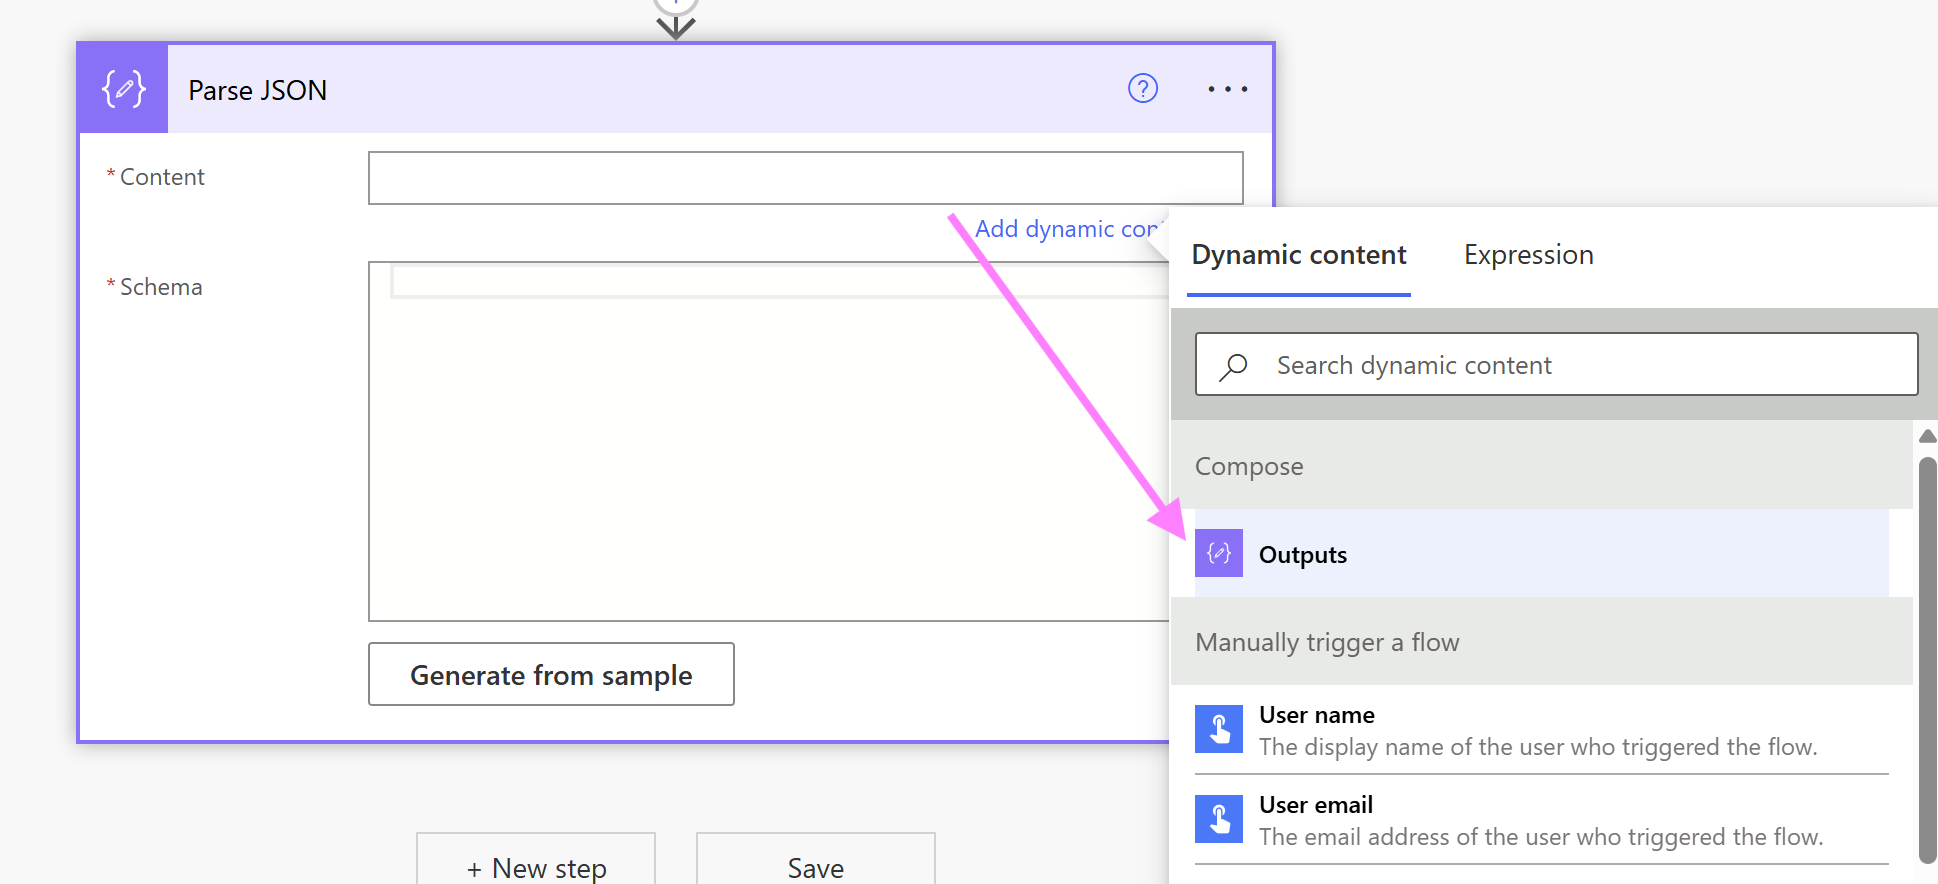
Now we need to add the Parse JSON action. This is needed to transform the raw JSON string (from the Compose action) into a structured format that we can easily reference in subsequent actions. This allows Power Automate to understand the data's schema, making it possible to reference individual properties like title and url in the flow.
In the Content field, we want to use dynamic text to pull in the Outputs from the Compose step:
For the Schema we'll need to tell Power Automate how to interpret the raw JSON data. This will make it possible to extract specific values from it.
If we were retreiving the JSON data from an external file, we'd first have to test the flow and copy it from the body, but as we've already got our JSON data, we can hit the Generate from sample button, and paste in the the same JSON data from the compose step: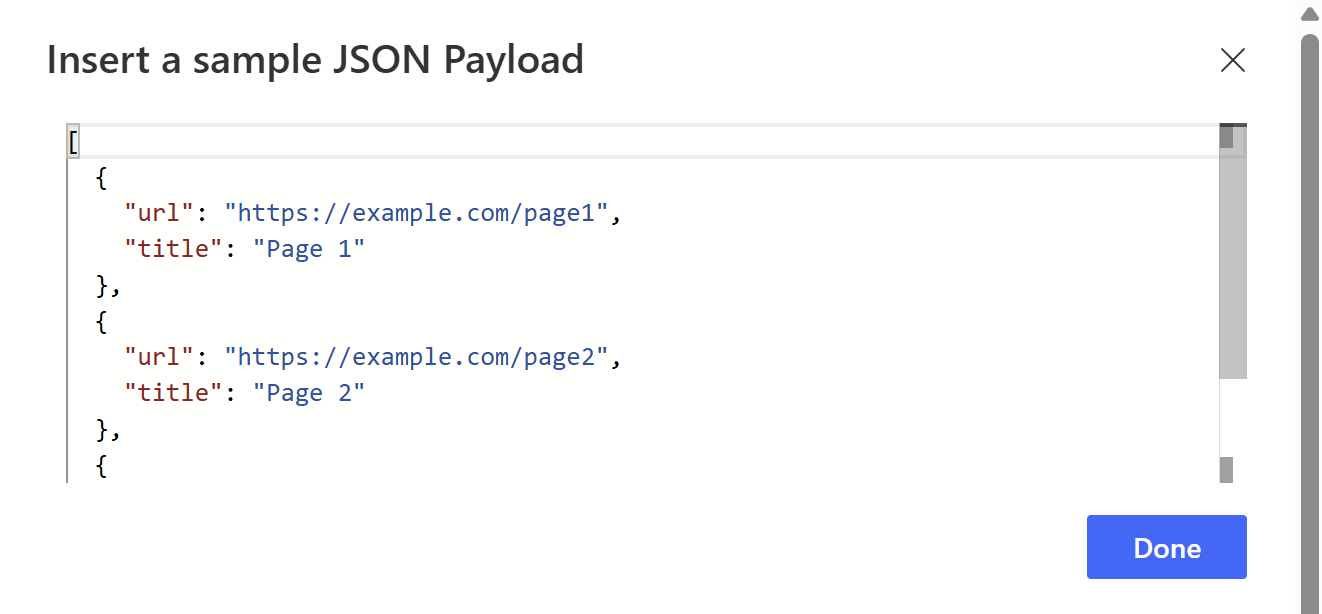
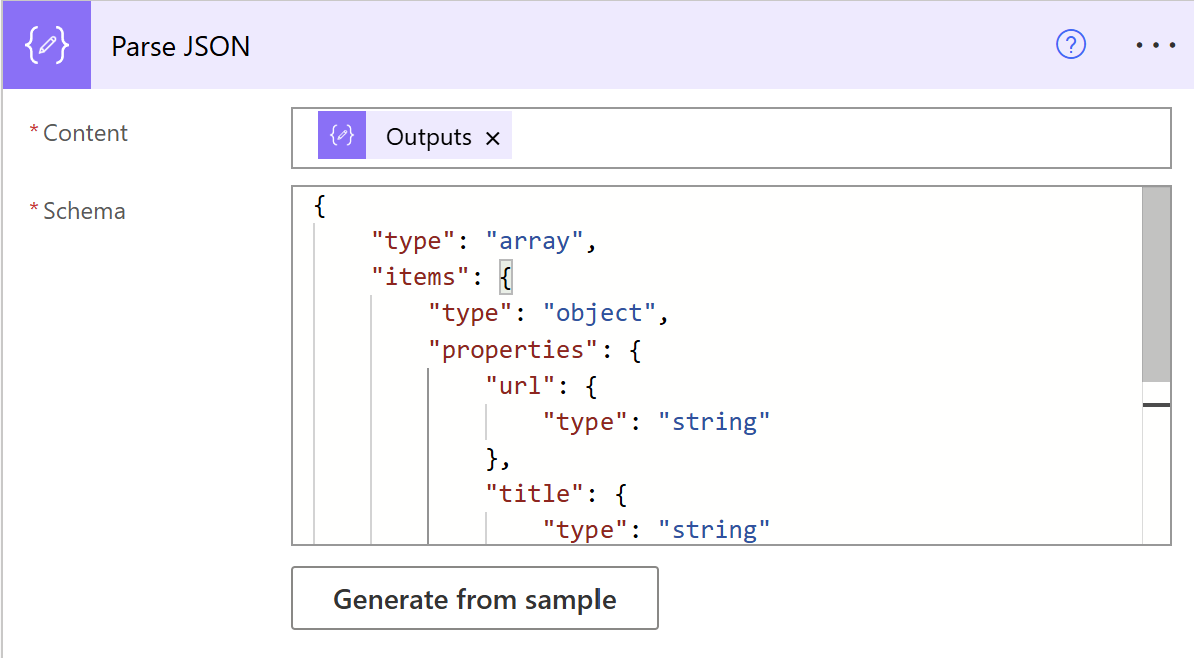 This creates an array of objects, which represents a page, with two properties: url (a string) and title (also a string).
Now we can start getting to work on the HTML. Let's use the Initialize a variable action for this.
Name: htmlContent
Type: string
Value:
<html>

<head>
  <title>Page List</title>
</head>

<body>
  <h1>Pages</h1>
  <ul>
Next, we need to loop through each page using the 'Apply to Each' action to process each object in the array. This loop will go through every page, allowing us to access its individual properties, such as url and title.
Select an output from the the Parse JSON action by using the dynamic content > Parse JSON > Body
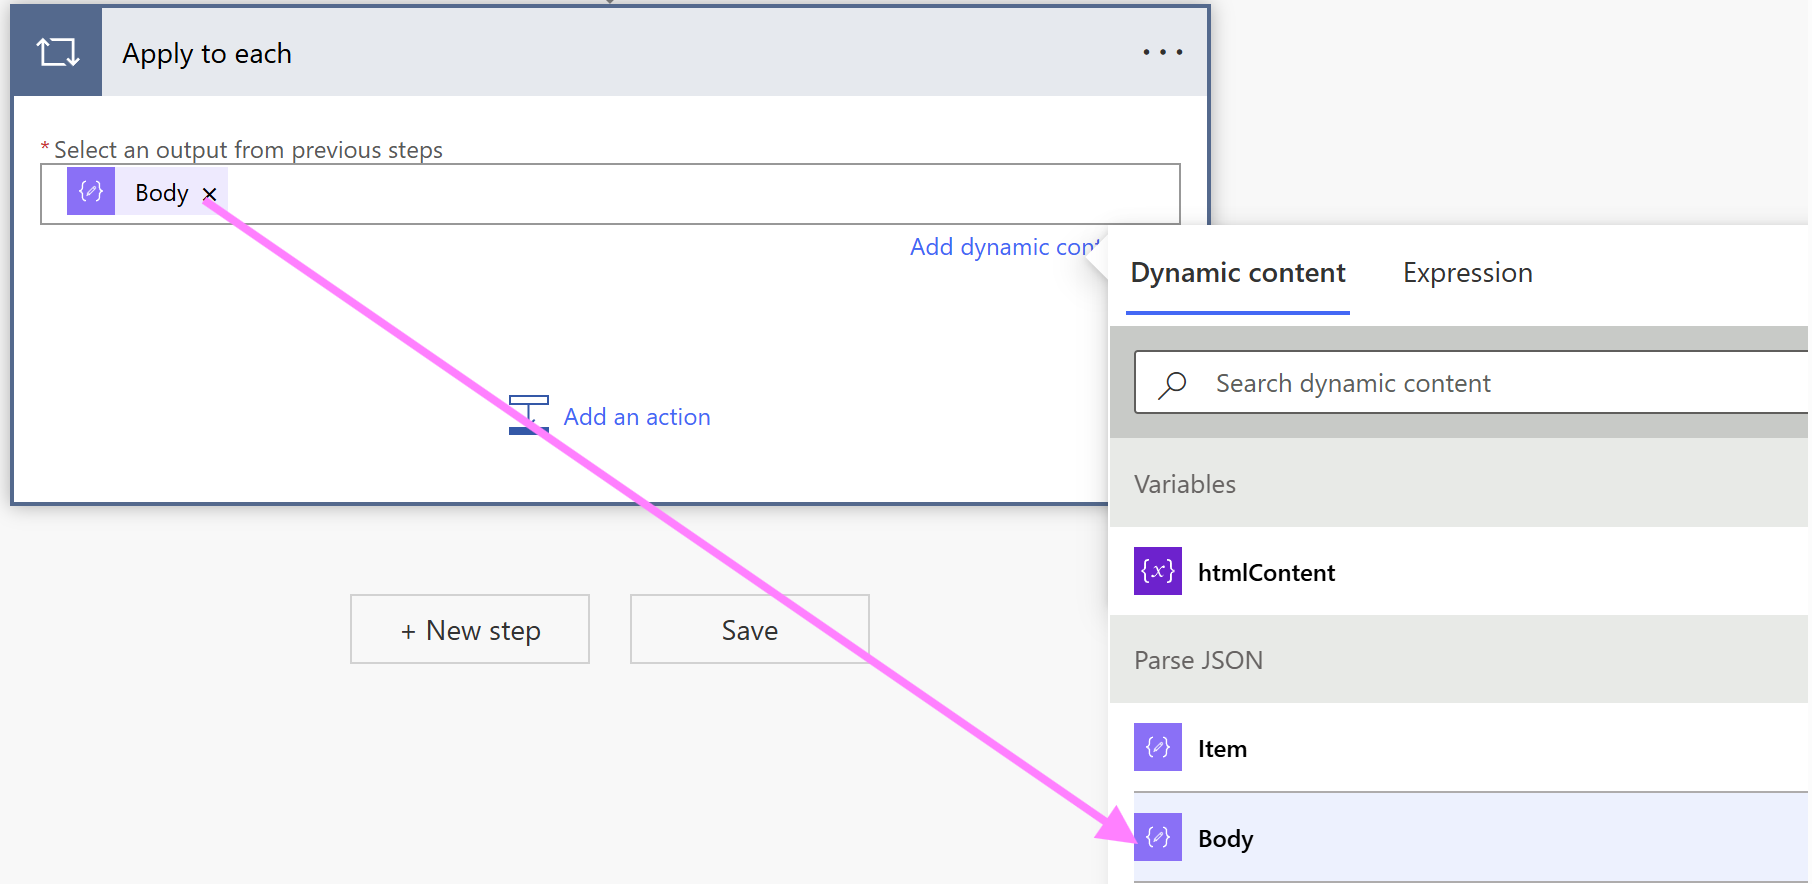
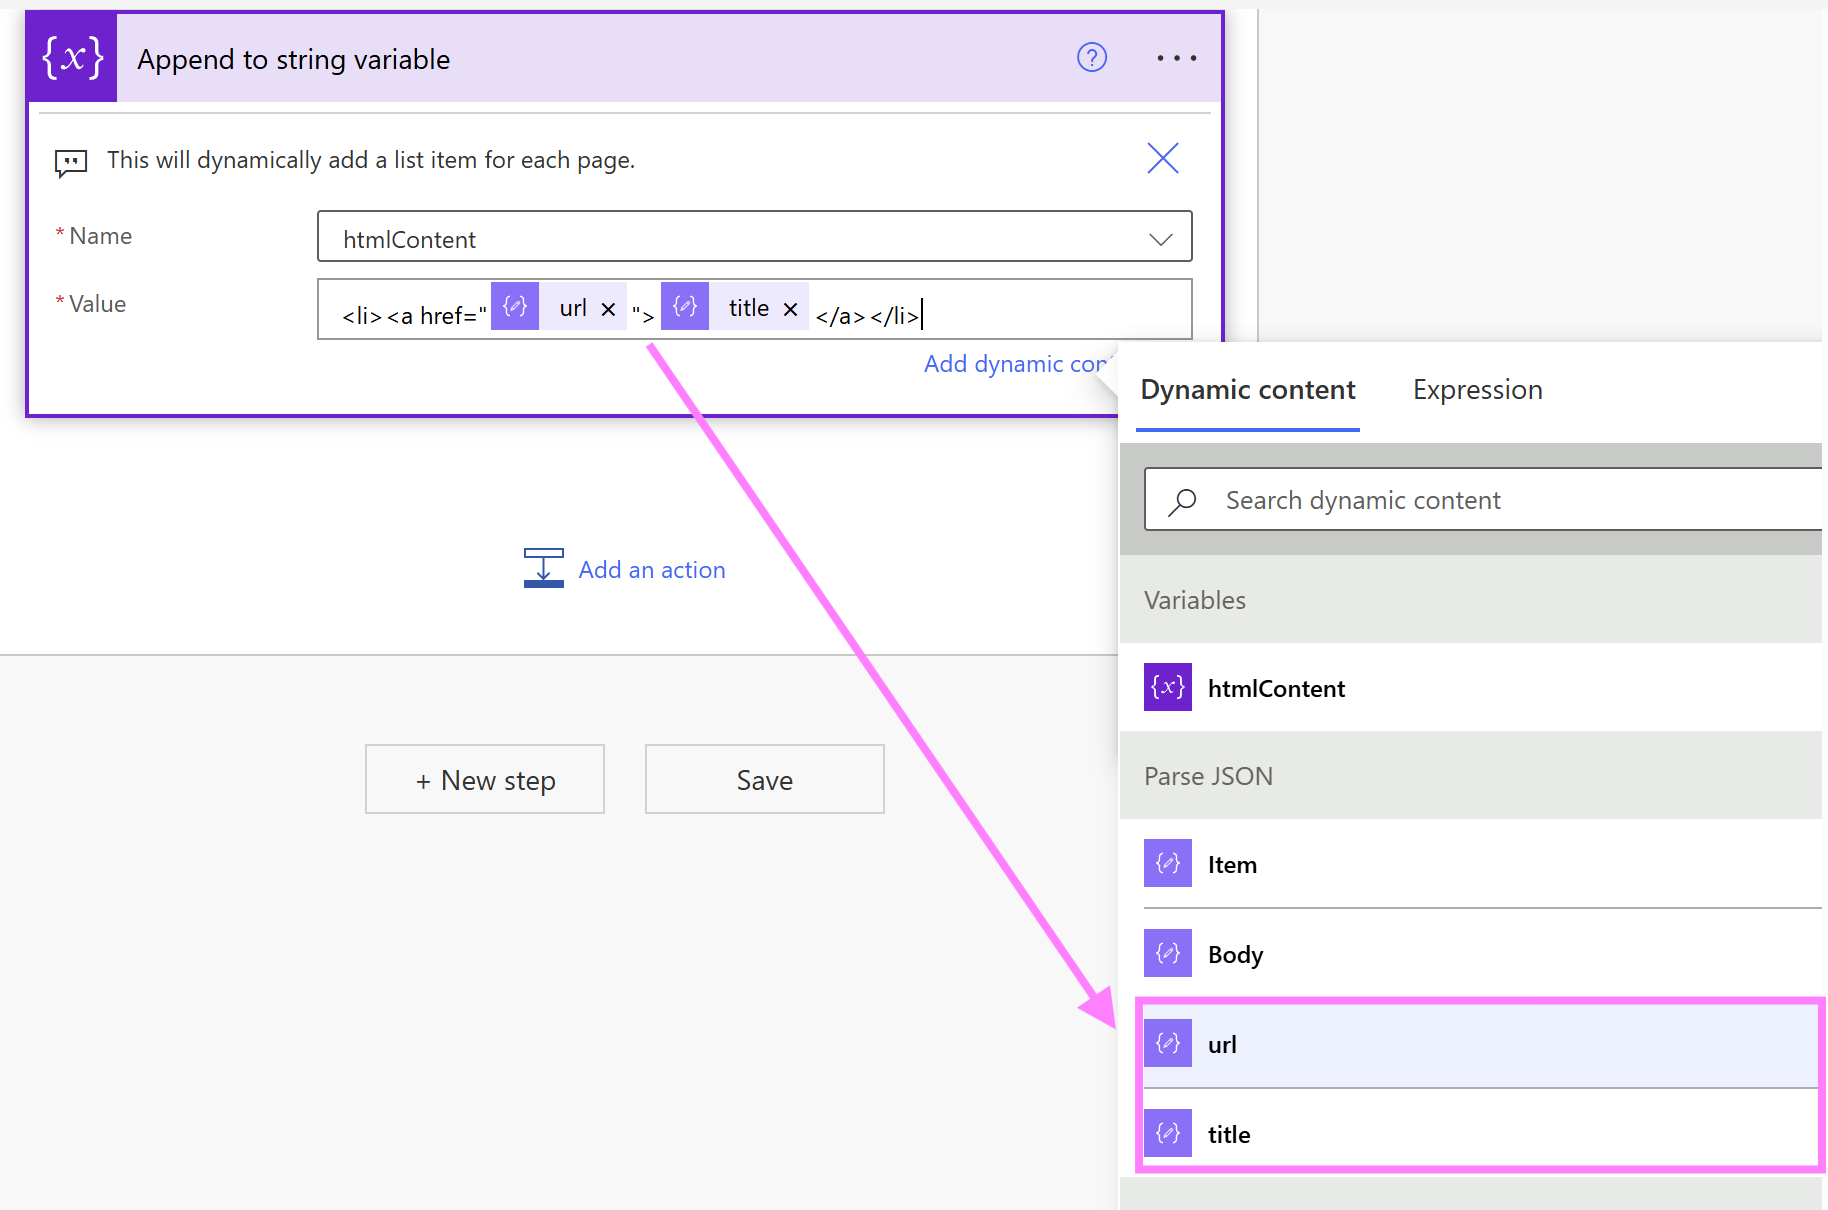
Now we can dynamically add a list item for each page. Inside the Apply to each action, and the Append String to Variable action. Select the htmlContent variable we initialized earlier. In the value we'll add the html for the list item, then use dynamic content for the url and title that comes from the output of the Parse JSON action:
 Let's close the list, body and html tags by adding another Append String to Variable action. Select the htmlContent variable, and add:
</ul>
</body>

</html>
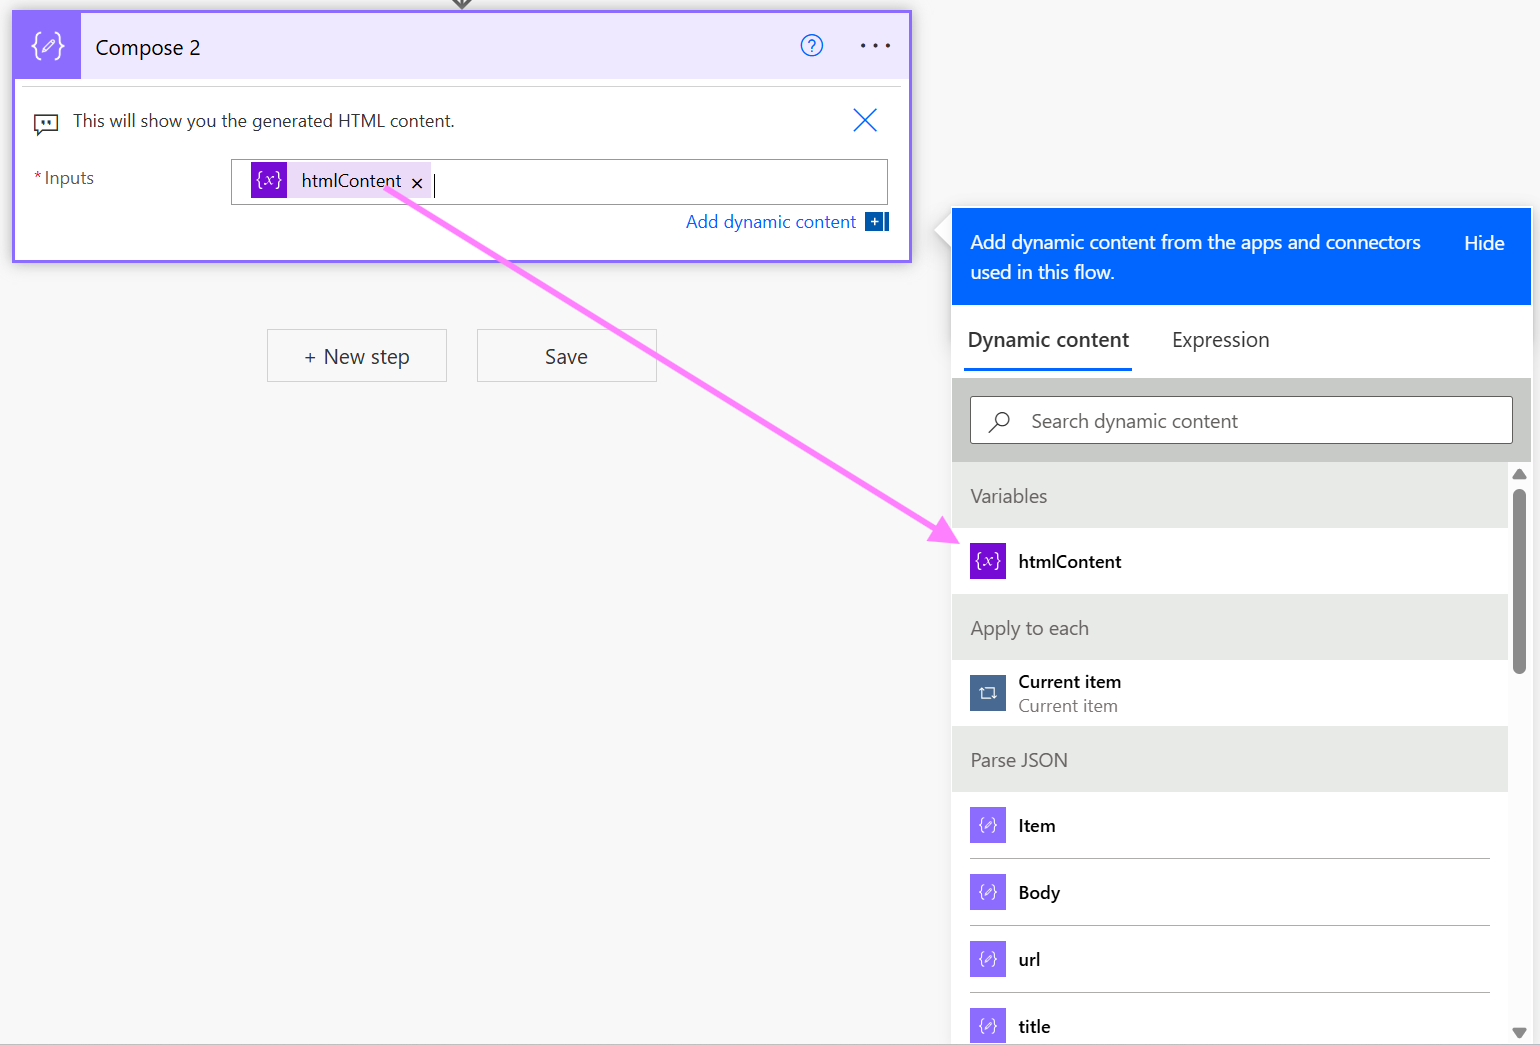
That's all we need to transform our JSON data to HTML, we just need to output it somewhere! For this we can use a Compose action again. In the value, select dynamic content, and the htmlContent variable:
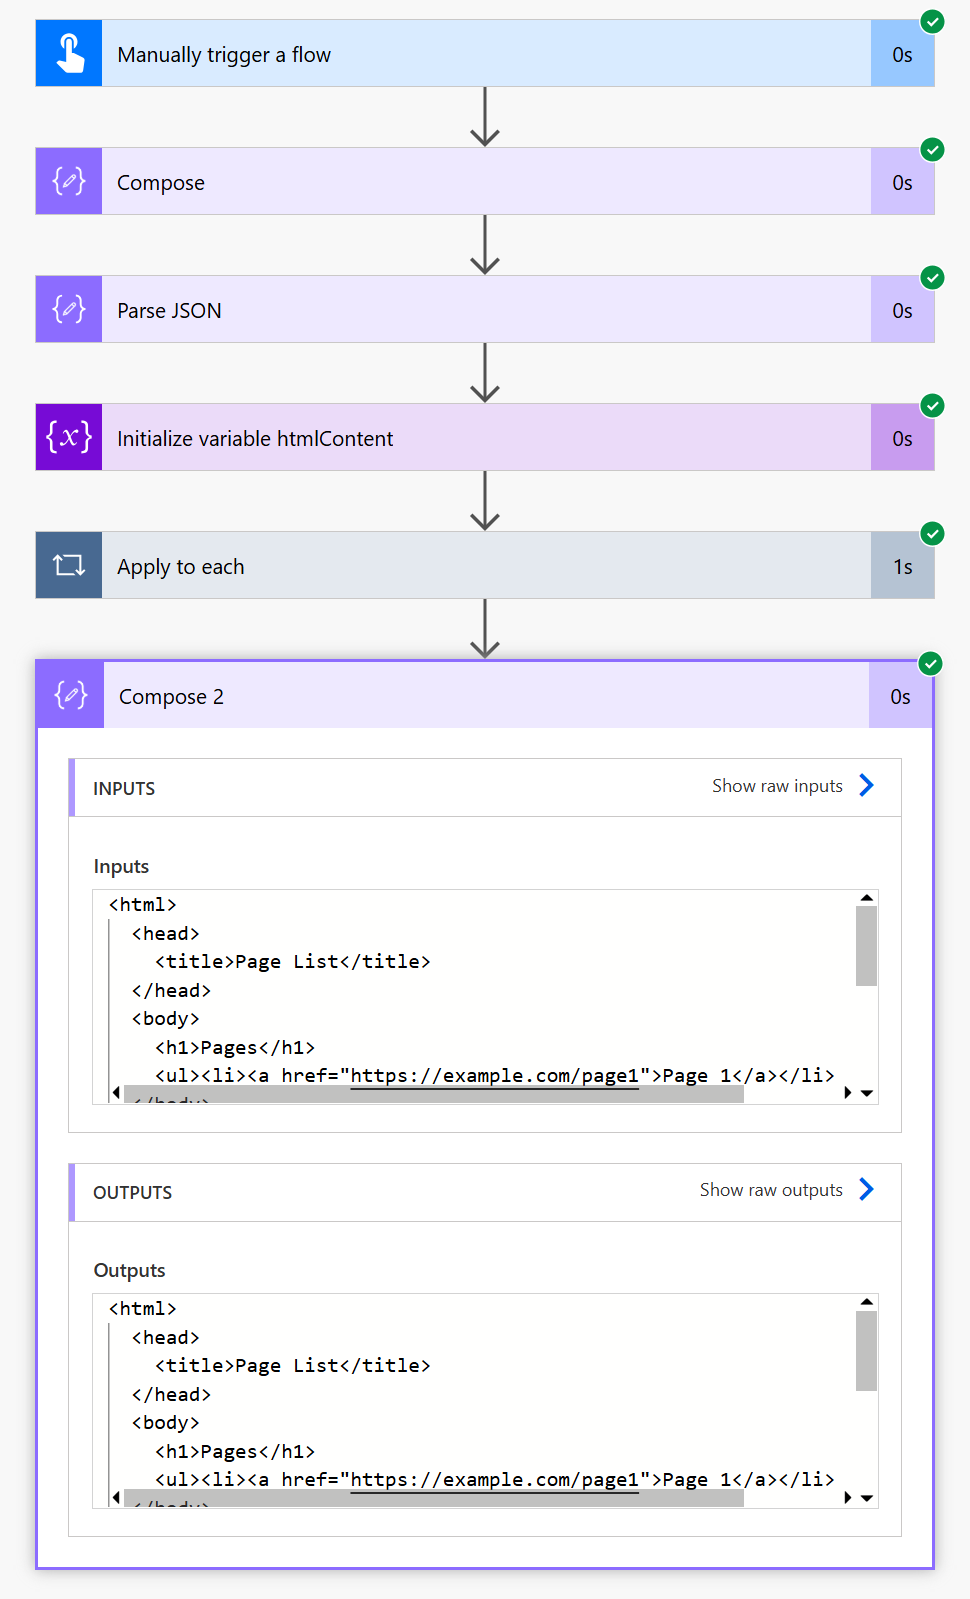
Ready to Test! Save the flow, and hit the Test button: If all the steps pass, you should see a green tick on each box. Expand out the last compose action, where you can see the final HTML output:
